Fisher-price 79030 User Manual
Browse online or download User Manual for For the car Fisher-price 79030. Fisher-Price 79030 User Manual
- Page / 20
- Table of contents
- BOOKMARKS
Summary of Contents
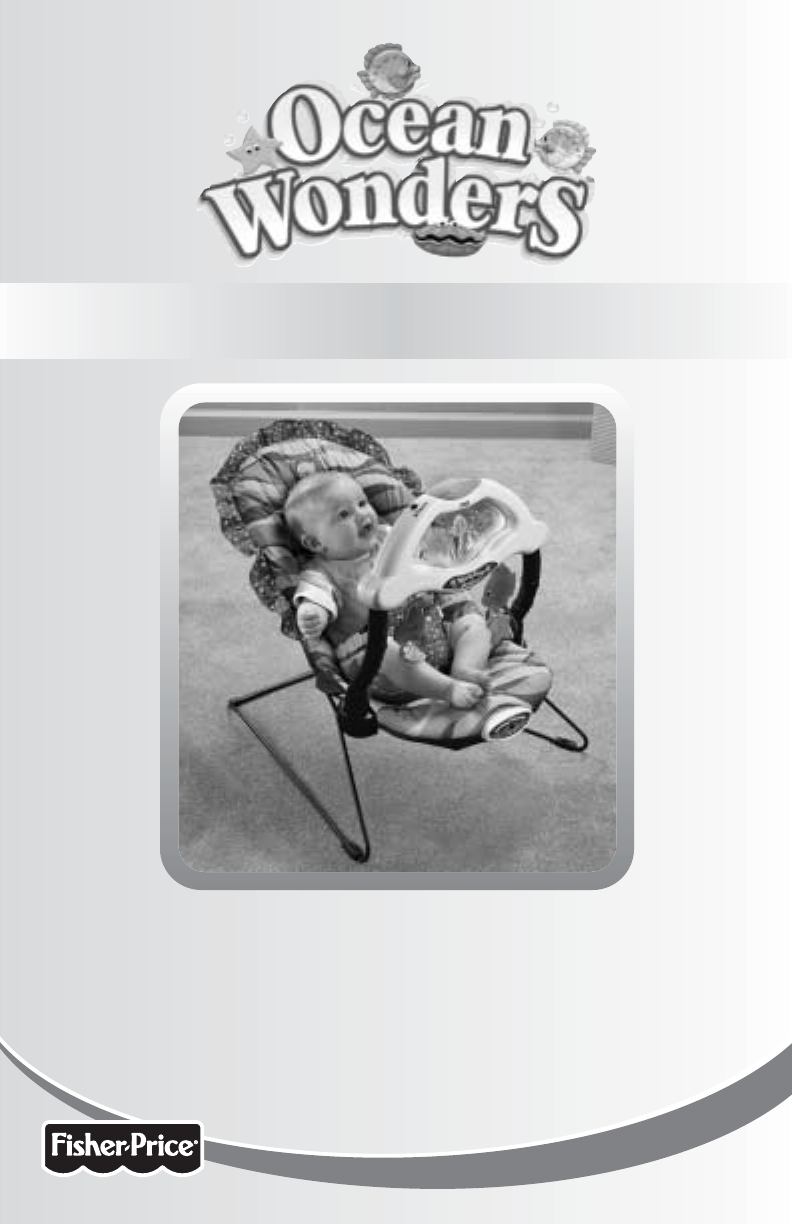
www.fisher-price.comAquarium Bouncer™Model Number: 79030Please keep this instruction sheet for future reference,as it contains important information.A
•Check to be sure the seat back tube bends backward.•Pull the seat back tube up to be sure it is secure.•If the seat back tube does not bend backward
•Unbuckle the restraint belts from the restraint pad. Push the restraint belts back through the slots in the pad .•Fit the pad upper pocket onto the
•Fit both restraint belts back through the pad slots, as shown.Assembly127RestraintBelts
Assembly138• Insert and “snap” the ends of the toy barinto the sockets in the footrest.•Make sure the toy bar latches are secure.The small tabs on the
14Set-Up & UseTo prevent serious injury and/or falls:•Never use on any elevated surface,since child’s movement may causebouncer to slide or tip ov
LoosenTo tighten the belts:•Feed the anchored end of the belt up through the buckle to form a loop .•Pull the free end of the belt .•Repeat this pr
Set-Up & Use•Slide the mode switch to for baby activated mode.•When baby bats either toy, baby is rewarded with wave sounds, bubblingaction and li
Set-Up & Use•Slide the mode switch to for parent activated mode. Baby enjoys 10 minutes of music, lights and bubbling action.•Select music, or sou
Set-Up & Use•The teethers are removable from the toys on the toy bar. Simply twist theends of each teether slightly to remove from either toy.•To
Set-Up & Use19The pad is machine washable.Wash the pad separately in cold water on the gentle cycle. Do not use bleach. Tumble dry separately on l
2Warning To prevent serious injury and/or falls:•Never use on any elevated surface,since child’s movement may causebouncer to slide or tip over.•Never
Fisher-Price, Inc., a subsidiary of Mattel, Inc., East Aurora, NY 14052 U.S.A.©2002 Mattel, Inc. All Rights Reserved. ® and ™ designate U.S. trademark
Parts3Shown Actual Size#8 x 3/4" Screw - 2PadToy BarFootrest withElectronic UnitSeatBackTubeRight BaseWireLeft Base WireBase TubeRemovableTeether
•Locate the electronic unit on the footrest wire. You will see that there are two battery compartments.The smaller battery compartment powers t
Battery Tips51.5V – Soother1.5V x 3 – Toy Bar“D” (LR20)SHOWN ACTUAL SIZE+–•Do not mix old and new batteries.•Do not mix different types of batteries:
•Place the base tube on a flat surface as shown.•Position the left and right base wires as shown.Note the location of the colored tab on the left and
Assembly7•Position the footrest so that the electronic unit battery compartment doors are upright.•While flexing the base wires toward each other, hoo
8Assembly•Position the seat back tube so that it bends backward.• Match the colored symbol on the seat back tube to the colored symbol onthe base wire
Assembly9•Fit a retainer (rounded side inward) to one end of the seat back tube.• Insert a screw through the outside hole in the seat back tube and in
Related products and manuals for For the car Fisher-price 79030
 (8 pages)
 (48 pages)
© 2020, manymanuals.com. All rights reserved. | 3.700 s |
 Manymanuals.com
 Manymanuals.de
 Manymanuals.fr
 Manymanuals.it
 Manymanuals.pl
 Manymanuals.cz
 Manymanuals.es
 Manymanuals-pt.com
Comments to this Manuals